Fillet is another basic features used in part modeling. Fillet is similar to chamfer except it is use to round the edges / corners. In engineering fillet is use for avoiding stress concentration or to facilitate smother flow of stress in a body.
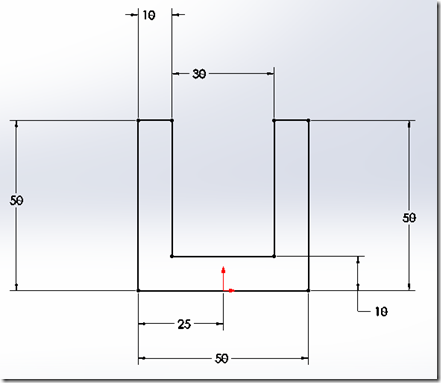
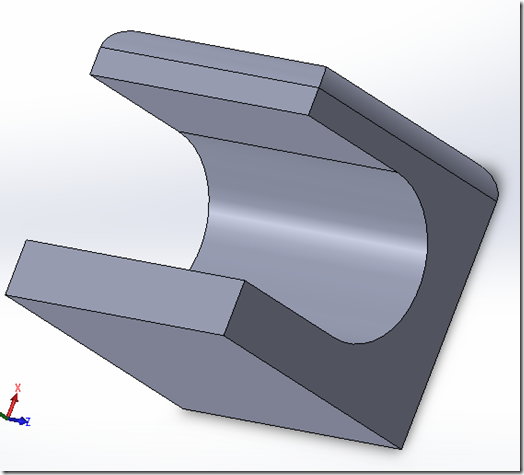
Lets start with sketching the follow u bracket
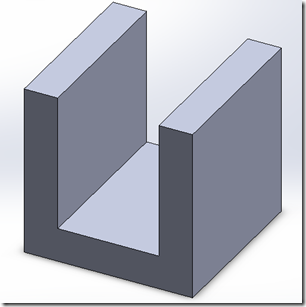
Now extrude it to a distance of 50 mm you will end up with a part as shown
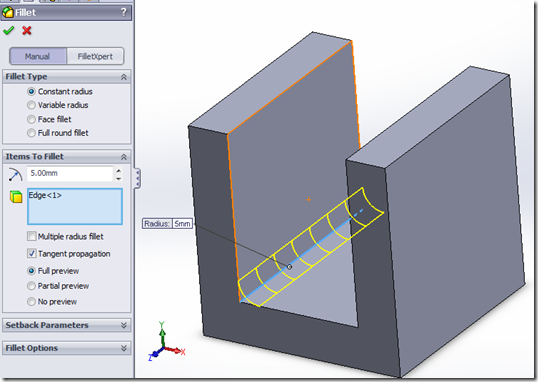
Now click on the fillet button in features button  and select the constant radius option. Enter 5mm as the radius and select one of the inner most edge as shown
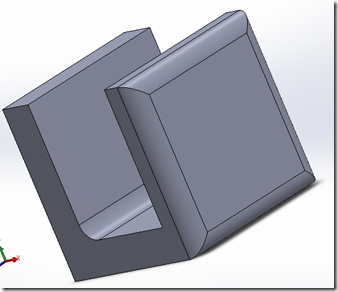
Click ok you will see the final structure.
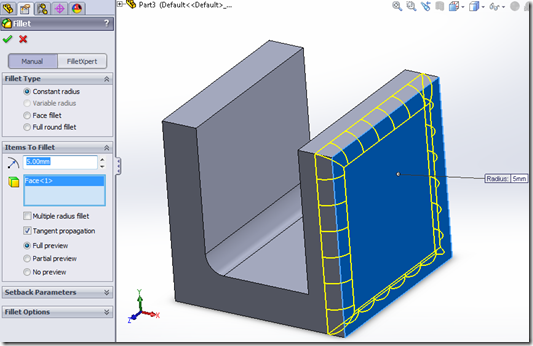
You can also fillet all edges on a face. To do this just select one of the faces.
Click ok and you will see the final part as
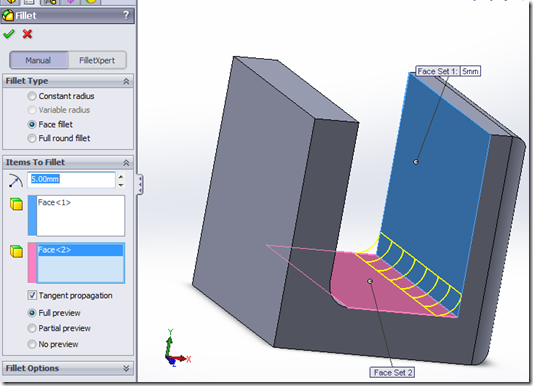
There are other options such as face fill, where you can select two faces and apply a fillet between them as shown.
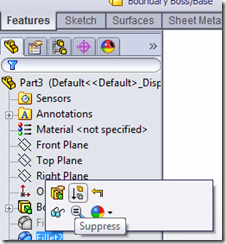
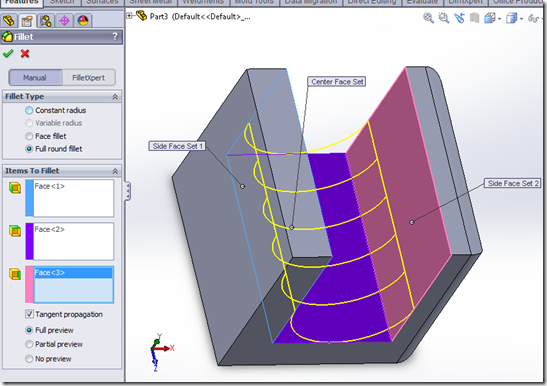
You can also make a round fillet which automatically determines the radius based on three faces. This is the full round fillet. Just select the three faces as shown in figure and select ok, you will see the round fillet in action. To do this first suppress / delete fillet1 & fillet2 and then click on fillet button. To suppress a fillet just navigate to the respective fillet in left pane select it & right click you will see menu with suppress option as shown.
Now after suppressing fillet 1 & 3 click on fillet button and select full round fillet and select face 1, face 2 & face 3 to fillet as shown.
the final part after face fillet will be like
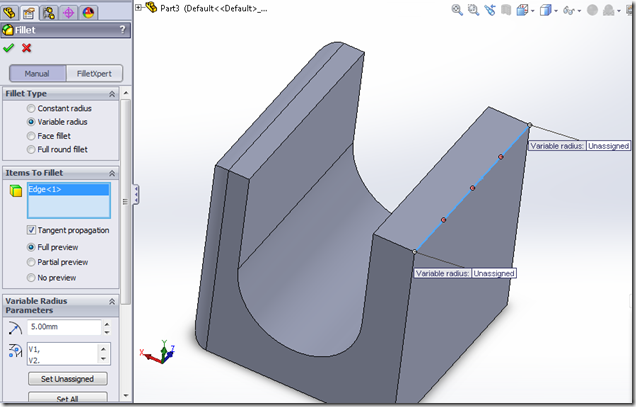
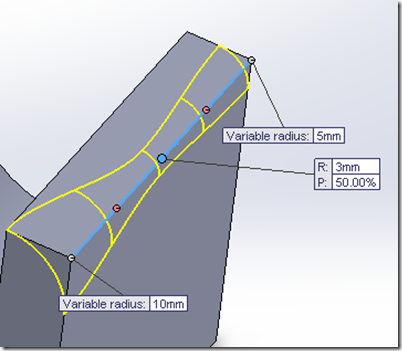
Variable radius fillet is the most complex of the above fillets. Here we can change the radius of the fillet as we go along the edge. To simulate how to use the variable radius fillet, click on the fillet button, select the upper edge of the U-Bracket as shown in figure and select the variable radius option
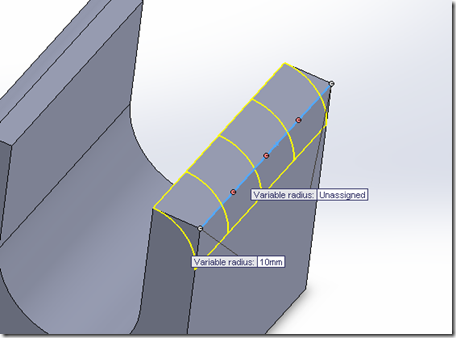
Click on the ”Unassigned” text in the variable radius prompt and enter 10 mm.
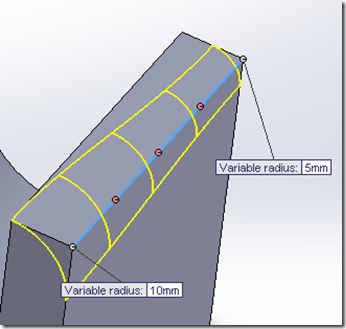
Now click on the other prompt and enter the radius as 5 mm.
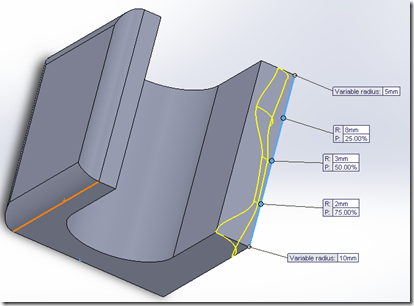
Now click on the middle point of the three control points which is highlighted in orange and enter a radius of 3mm.
Now similarly double click on the first & third point and enter a radius of 2 & 8 respectively. Control points are the points where the radius of the fillet changes and the radius of the points between the control points is determined using interpolation.
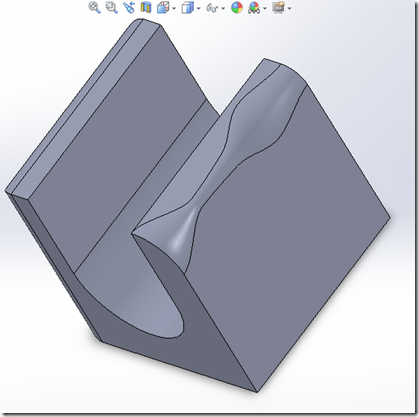
click ok and you will the final part like…
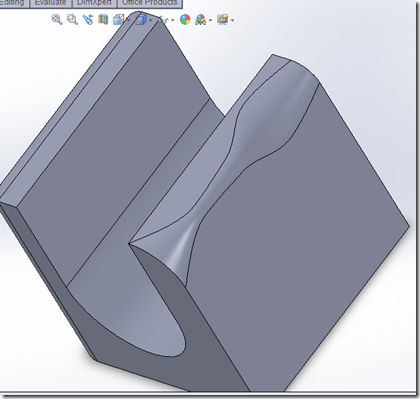
We have selected the smooth transition in above case so we are seeing a smooth curve, if we select straight transition between control points you, the final fillet structure will be
Pingback: SolidWorks CSWA Tutorial 1: Preparing for the Exam | SolidWorks Tutorials